How to Install a Ceiling Fan: A Comprehensive Guide
Introduction
Installing a ceiling fan may seem like a daunting task, but it's actually a relatively straightforward process that can be completed by anyone with basic tools and knowledge. In this article, we'll take you through the step-by-step process of how to install a ceiling fan safely and correctly.Choosing the Right Ceiling Fan
Before you begin the installation process, it's essential to choose the right ceiling fan for your home. Consider the size of the room, the type of fan you need (e.g., indoor or outdoor), and the style that suits your décor. Make sure to select a fan that matches your home's electrical rating and has the necessary features, such as remote control or dimming.Tools and Materials Needed
To install a ceiling fan, you'll need the following tools and materials: * A ladder or scaffolding * A screwdriver (both flathead and Phillips) * A wrench or pliers * A voltage tester * A downrod (if not included with the fan) *Electrical wire (if not included with the fan) *Mounting bracket (if not included with the fan) * Fan blades (if not included with the fan) *Remote control (if included with the fan)Step 1: Shut off the Power
The first step in installing a ceiling fan is to shut off the power to the circuit at the breaker box or fuse box. Verify that the power is off using a voltage tester to ensure your safety.Why is it essential to shut off the power?
Shutting off the power to the circuit prevents electrical shock or electrocution, which can be fatal. It's also crucial to ensure your safety while working with electrical systems.Step 2: Remove the Existing Light (If Necessary)
As we can see from the illustration, Ceiling Fan Installation How To has many fascinating aspects to explore.
If you're replacing an existing light fixture with a ceiling fan, remove the old light fixture and any surrounding trim to prepare the area for the new fan.Removing the old light fixture
To remove the old light fixture, simply screw it off the mounting bracket or clips. Take care not to damage any wires or electrical connections.Step 3: Install the Mounting Bracket
The next step is to install the mounting bracket. This bracket will support the weight of the ceiling fan and ensure it stays securely in place. Make sure to attach the bracket to a sturdy part of the ceiling structure.Choosing the right mounting bracket
The type of mounting bracket you need depends on the type of ceiling fan you're installing. Common types include suspenders (for standard ceilings), hangers (for vaulted ceilings), and chain hook brackets.Step 4: Hang the Ceiling Fan
Once the mounting bracket is installed, hang the ceiling fan by attaching it to the bracket using screws or clips. Hang the fan at the correct height, usually between 7-9 feet from the ceiling.Aligning the fan with the mounting bracket
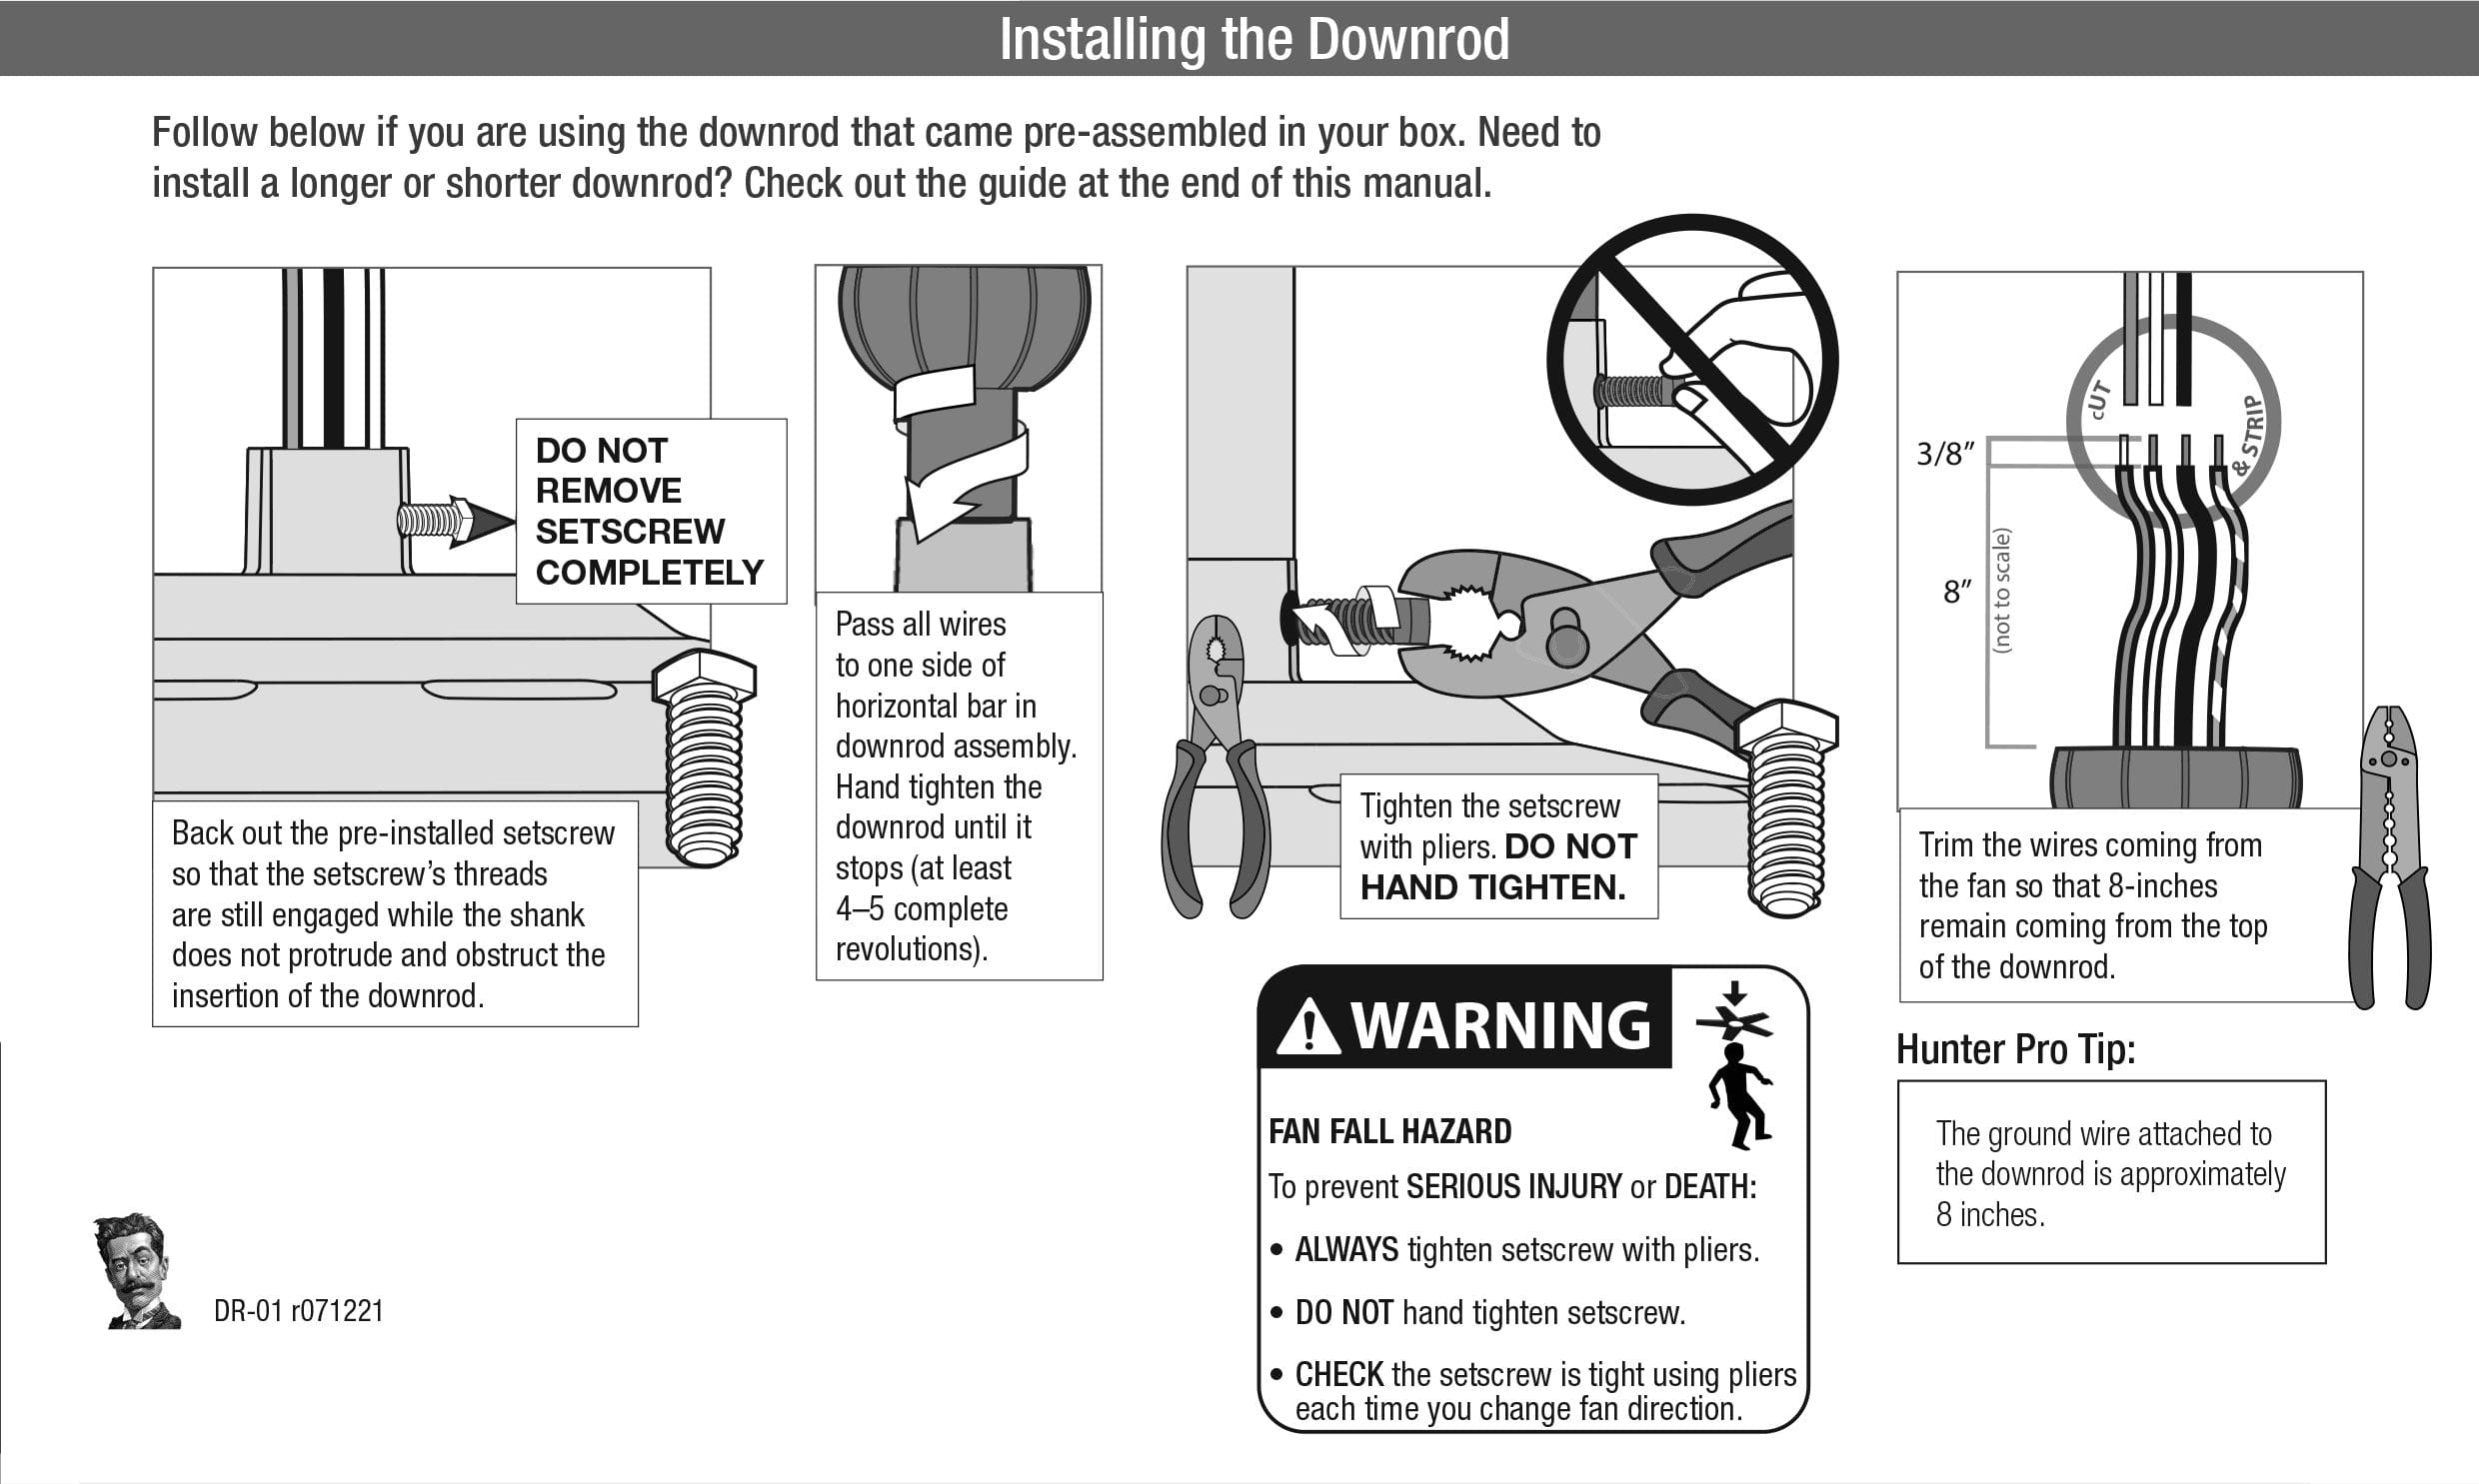
Be sure to align the fan blades with the mounting bracket to ensure even airflow and prevent spinning unevenly.Step 5: Install the Downrod (If Necessary)
As we can see from the illustration, Ceiling Fan Installation How To has many fascinating aspects to explore.
If your ceiling fan comes with a downrod, install it according to the manufacturer's instructions. The downrod adjusts the fan's height and angle to ensure optimal airflow and reduce noise.Why is a downrod necessary?
A downrod is necessary for optimal airflow and motor performance. Without it, the fan may operate inefficiently or make excessive noise.Step 6: Connect the Electrical Wires
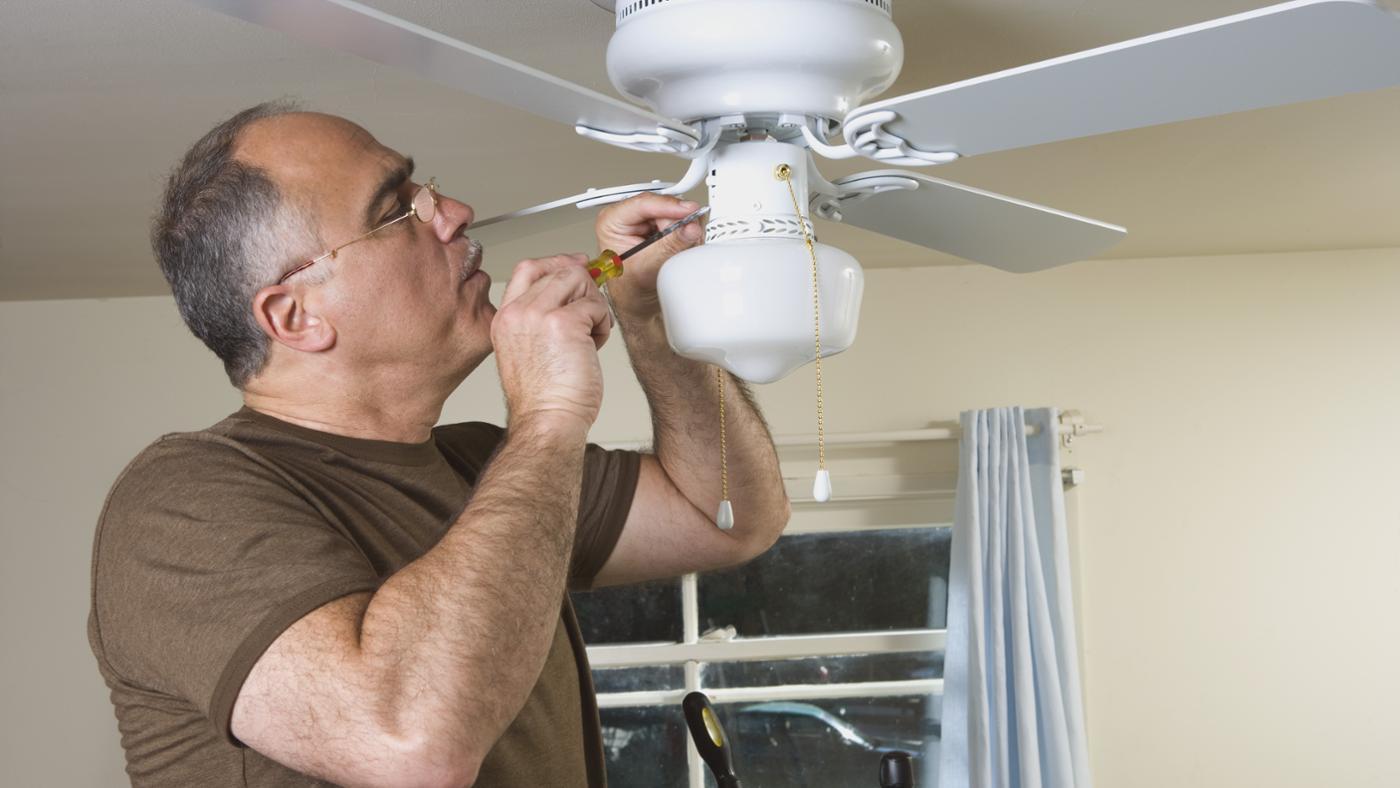
This step requires connecting the electrical wires to the ceiling fan's socket. Ensure you're comfortable working with electrical systems and follow the manufacturer's instructions to avoid damaging the fan or causing electrical shock.Choosing the right type of wire
Use the correct type and gauge of wire for your ceiling fan. A 14-gauge or 12-gauge wire is typically sufficient for most residential ceiling fans.Step 7: Mount the Fan Blades
After connecting the electrical wires, install the fan blades securely onto the fan body. Use screws or clips to attach the blades, following the manufacturer's instructions.Why is mounting the fan blades important?
Mounting the fan blades ensures even airflow and prevents motor damage from uneven spinning.Step 8: Install the Remote Control (If Included)

As we can see from the illustration, Ceiling Fan Installation How To has many fascinating aspects to explore.
If your ceiling fan comes with a remote control, install it according to the manufacturer's instructions. Make sure to pair the remote control with the fan's receiver to ensure it operates correctly.


 | Family Handyman")
")


:max_bytes(150000):strip_icc()/how-to-wire-a-ceiling-fan-5216529-Final-01-17123c6745dc416fb8fc308e6ffcbc88.jpg "How to Install Ceiling Fan Simply and Safely - oliviagarden.com")


