Writing a Check for a Financial Transaction: A Step-by-Step Guide
In today's digital age, it's easy to imagine that writing a check for a financial transaction is a thing of the past. While online banking and digital payments have become increasingly popular, there are still many situations where writing a check is necessary. From paying rent to making charitable donations, knowing how to write a check correctly can save you time, help you maintain accurate records, and prevent costly errors.Why Learn to Write Checks?
While digital transactions may be the norm, writing a check remains an essential financial skill. Checks are still commonly used for transactions like rent payments, small business transactions, gifts, and situations where electronic payments aren't accepted. Our guide and templates ensure you'll always be prepared when you need to write a check, helping you avoid errors that can lead to financial consequences.Components of a Check
Before we dive into the steps of writing a check, let's take a closer look at the different components of a check: *How to Write a Check: A Step-by-Step Guide
Writing a check is a simple process that requires attention to detail. Here's a step-by-step guide to help you write a check correctly: 1.Date
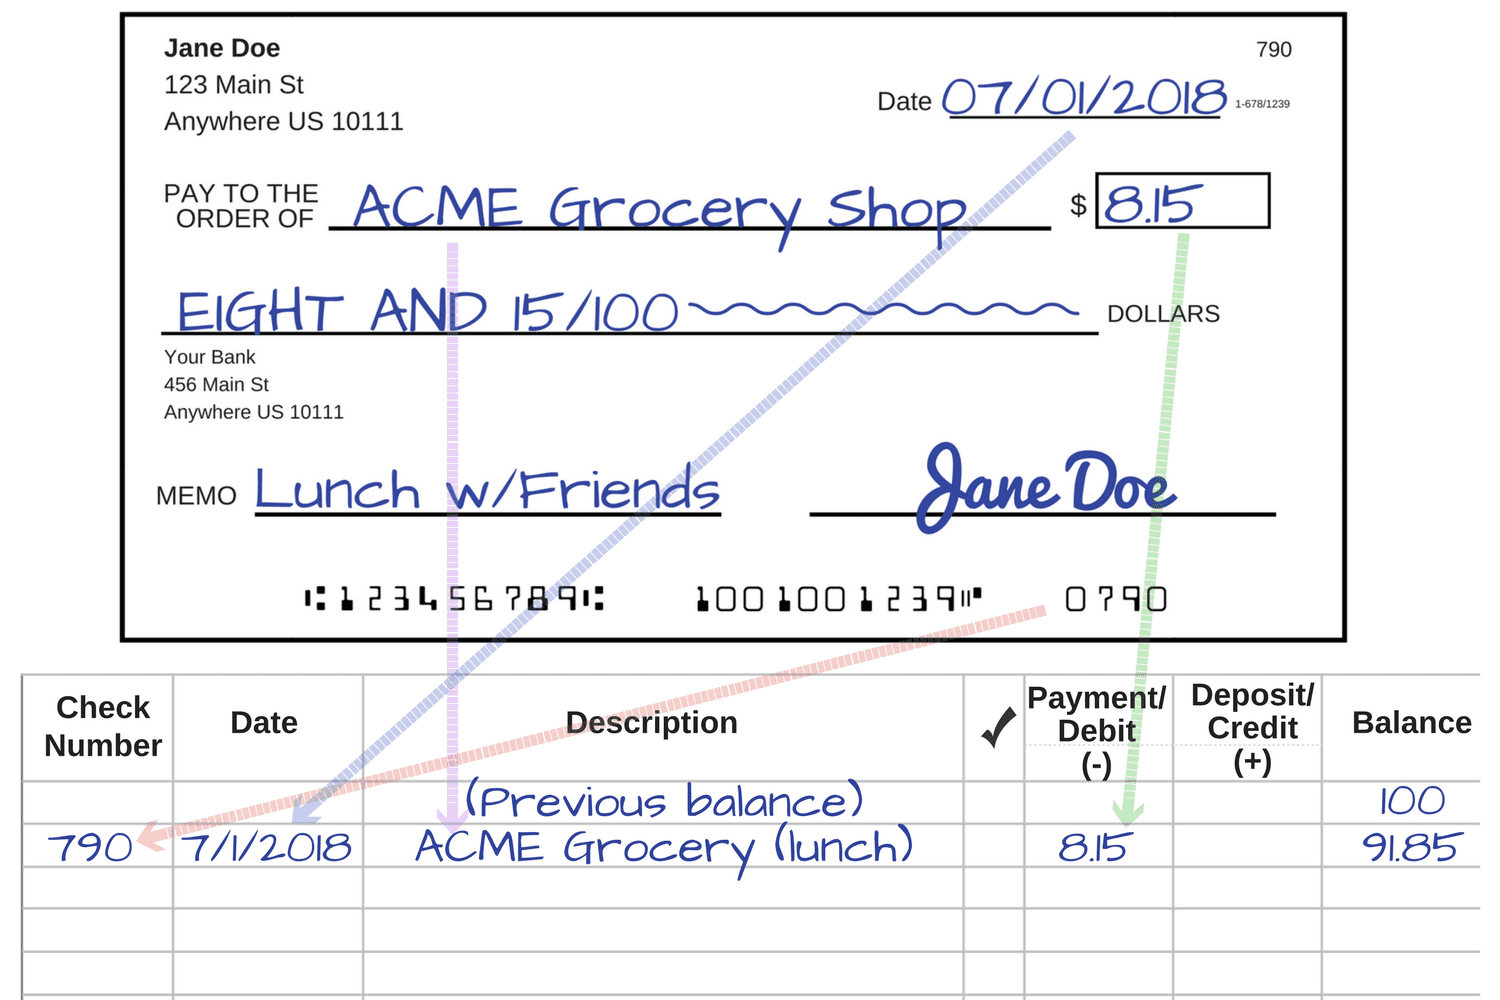
Payee's Name and Address
Fill in the payee's name and address in the "Pay to the order of" line. This should be the same as the payee's name and address listed on their receipt or invoice. 3.Amount
Write the amount you'd like to pay in both numerical and written form. The numerical value should be written in the box at the top right of the check, and the written amount should be spelled out in words below the numerical amount. 4.Memo Line
The memo line is an optional field for you to include a brief description of the transaction. This can be useful for record-keeping purposes or as a note to the payee. 5.Signature Line


:max_bytes(150000):strip_icc()/back-of-a-check-315354-v3-5b8814724cedfd002522df54.png "How To Write a Check: A Visual Guide - GOBankingRates")


")


